This micro-tutorial is meant for somewhat adept users. I will skip over most details and only show small aspects. Today I will be showing you some Substance Designer tips and tricks from some of my most recent work on concrete and glass. - I'll give credit throughout the tutorial to people who helped and inspired me.
Link to the 'Dilation Or Erosion Filter'
Concrete
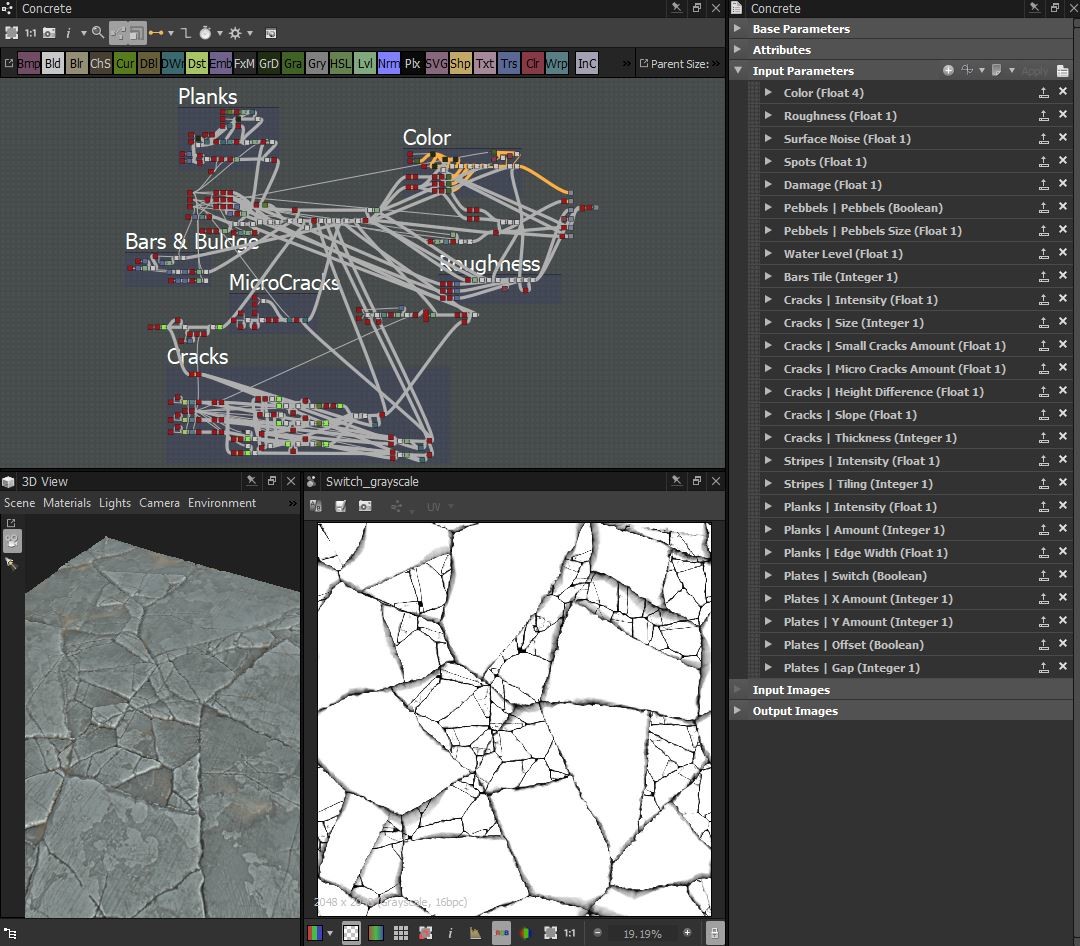
We'll start from the top and dive in on the details! Here you can see the full graph (which we will cover about 10% of) and the final crack-pattern.
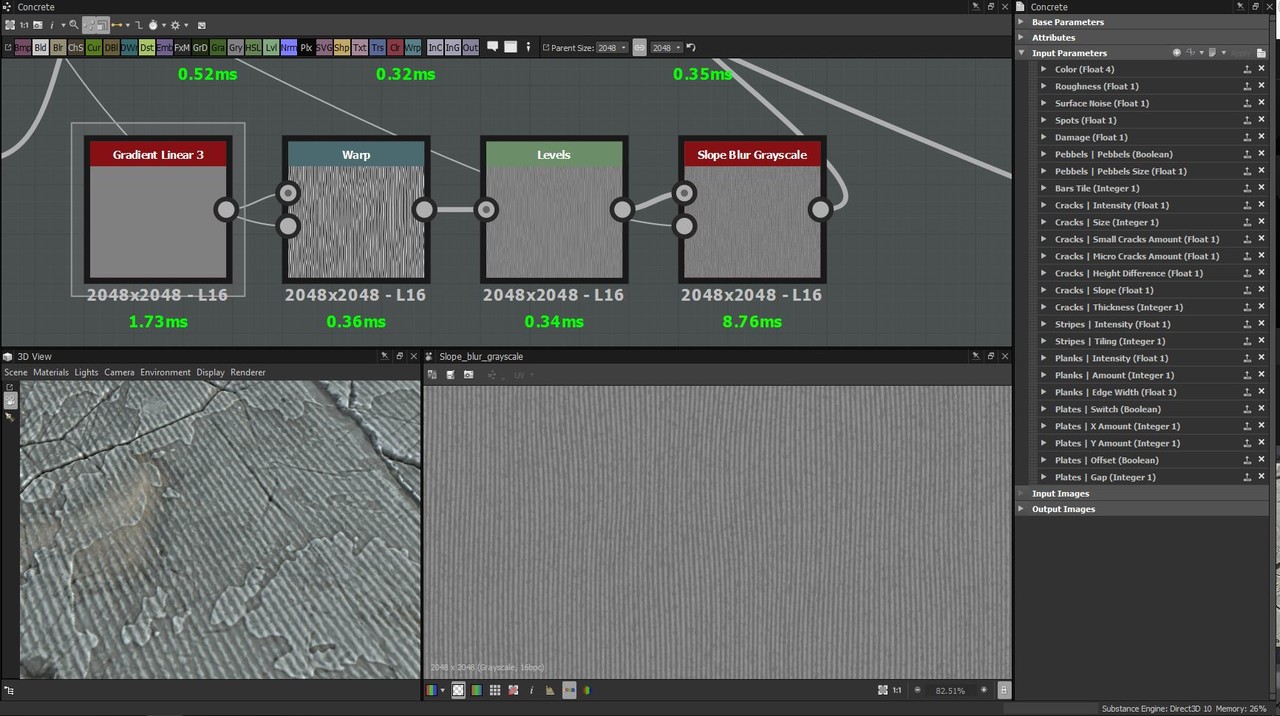
 First of all, to get some surface noise going, I applies a 'Gradient Linear 3' and crank up the tiling to 256, then warping it slightly with a 'Perlin Noise' so that the gradients aren't compleatly straight. I then run it through a slope blur with 'Cloud2', then blended it into my height map using the "overlay" blend mode.
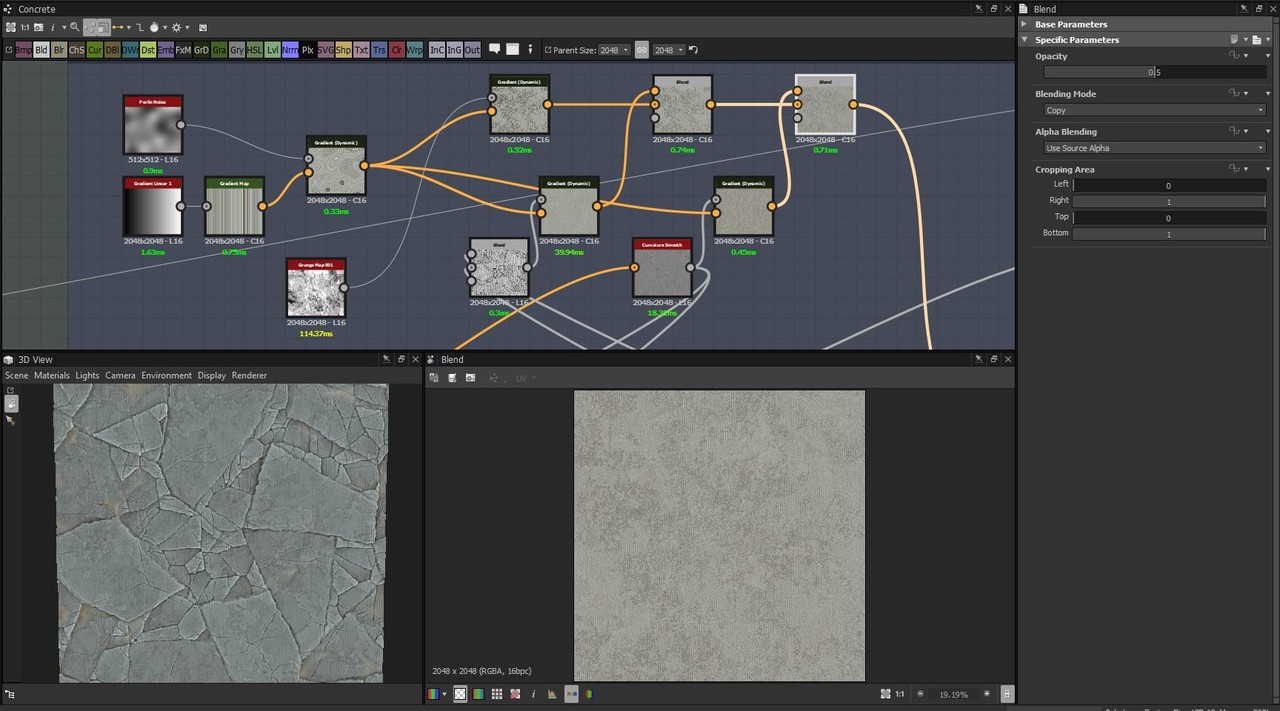
The basic color
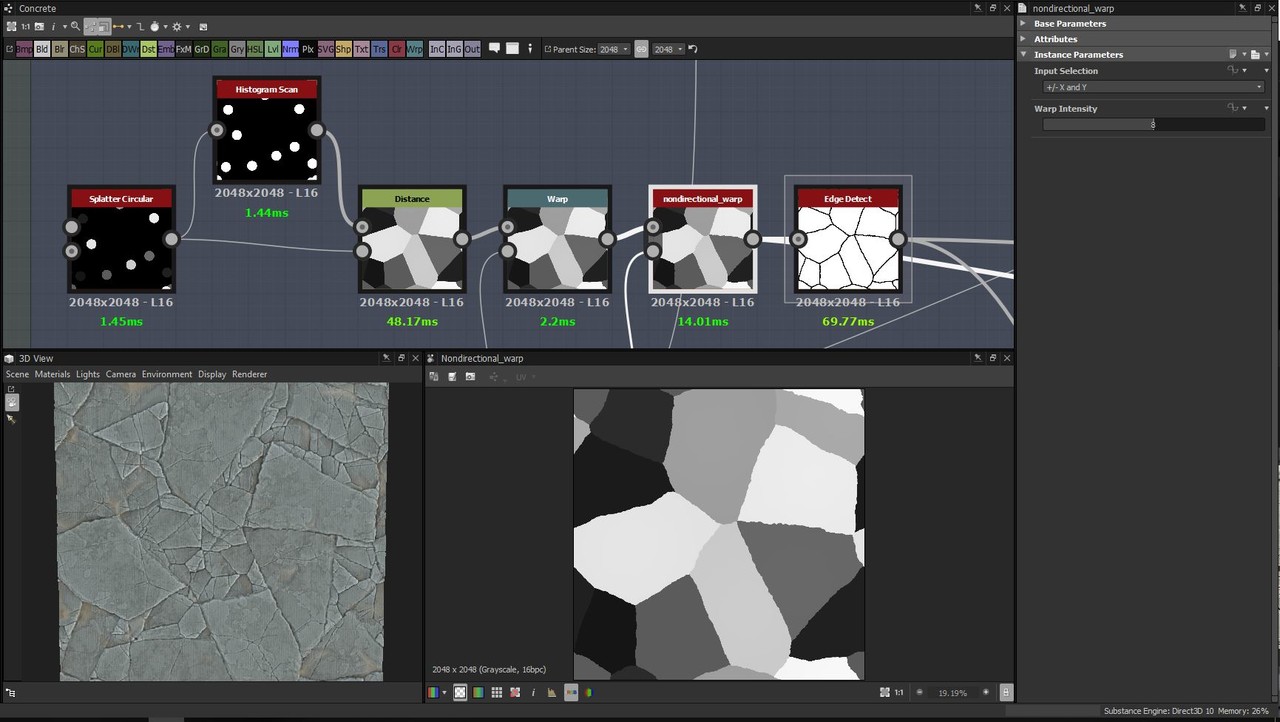
Here you can see the very basic way I create the largest crack-flakes in the pattern I warp it with a small 'Perlin Noise' and then with a 'Cloud2'. I use a 'nondirectional_warp'-node that I got from Daniel Thiger's Gumroad (I don't know who else to give credit to) - but a directional warp or even a slope blur could render a similar result.Major credit to Daniel Thiger, I've studied a lot of his graphes, this method is greatly inspired by his work:
I then feed the pattern into a 'FloodFill' to create gradients of the same shapes. I use the 'Dilation'-node to tighten up the gaps between the gradients. I blend in a mix of 'Cloud2' and a small 'Perlin Noise' (to add some noise and un-even-ness in the gradients) and then pull it through a 'Histogram Scan' - I will use this as a mask for where I will put my smaller cracks later on. As you can see, the histogram has the position parameter exposed: That's because I want to be able to tweak it as I go, masking out a larger or smaller part of the largest flakes.

I repeat this same process with two other, smaller crack patterns. Here you see how I blend them together: I simply use the 'copy' blend mode and use the histogram I generated before as the mask. I do this again but use a histogram that I generated from the smaller crack-pattern's gradients. The 'Directional Warp' is simply to off-set my cracks if they are used on tiles and the 'Switch'-node is connected to the global boolean "Plates - Switch". The last histogram uses a high contrast and a low position, I use ut later on to mask out the cracks or the flat surfaces.
Glass Fracture
This is the most essential part of the graph. I create two different radial patterns and blend them together, then I warp them a bit. Blending together the two 'crystal' noises was another idea given to me by Daniel Thiger - it's great for warping patterns into a more glass-crack-like pattern.
A closer look at what's happening here: I use two 'Splatter Circular', add them together, use a 'Histogram Scan' with position and contrast at 1 to get a white equivalent pattern to run then through the 'Distance'-node. I then use the 'Overlay' blending mode to combine two different patterns into one. I later warp this node with the crystal noise and then take the final pattern into an 'Edge-detect'-node.
Little extra
From my stylized sandstone bricks. This is what I did to get the subtle shifts in the color: I 'max-lighten' a 'Gradient Linear1' and half the value (a 'Histogram Scan' at position 0.25) of a 'Gradient Linear3' with each other. I then warp it with a large 'Perlin Noise', slope-blur and warp it with a directional noise and a flipped directional noise, flip it on the diagonals with the 'Safe Transform' node, warp it a bit more with the 'Perlin Noise'. Lastly, I use a Directional Warp with a similar noise to the crystal noise that I showed up above. I use these three patterns to generate the basic color of my sandstones.
I hope this makes any sense and that it will help someone! If anything is unclear or if you feel like something is missing, please let me know so that I can correct it!
//Daniel Swing


