
I've been asked what my process was for my 'Vinyl Chair Padding' material, so I though I'd make a small break-down of the height-map and some of it's elements. I should mention that this is something I did in ~4 hours a late night, meaning that there are definitely better and more precise approaches. This is all just stuff I came up on the spot or had wanted to try for a while.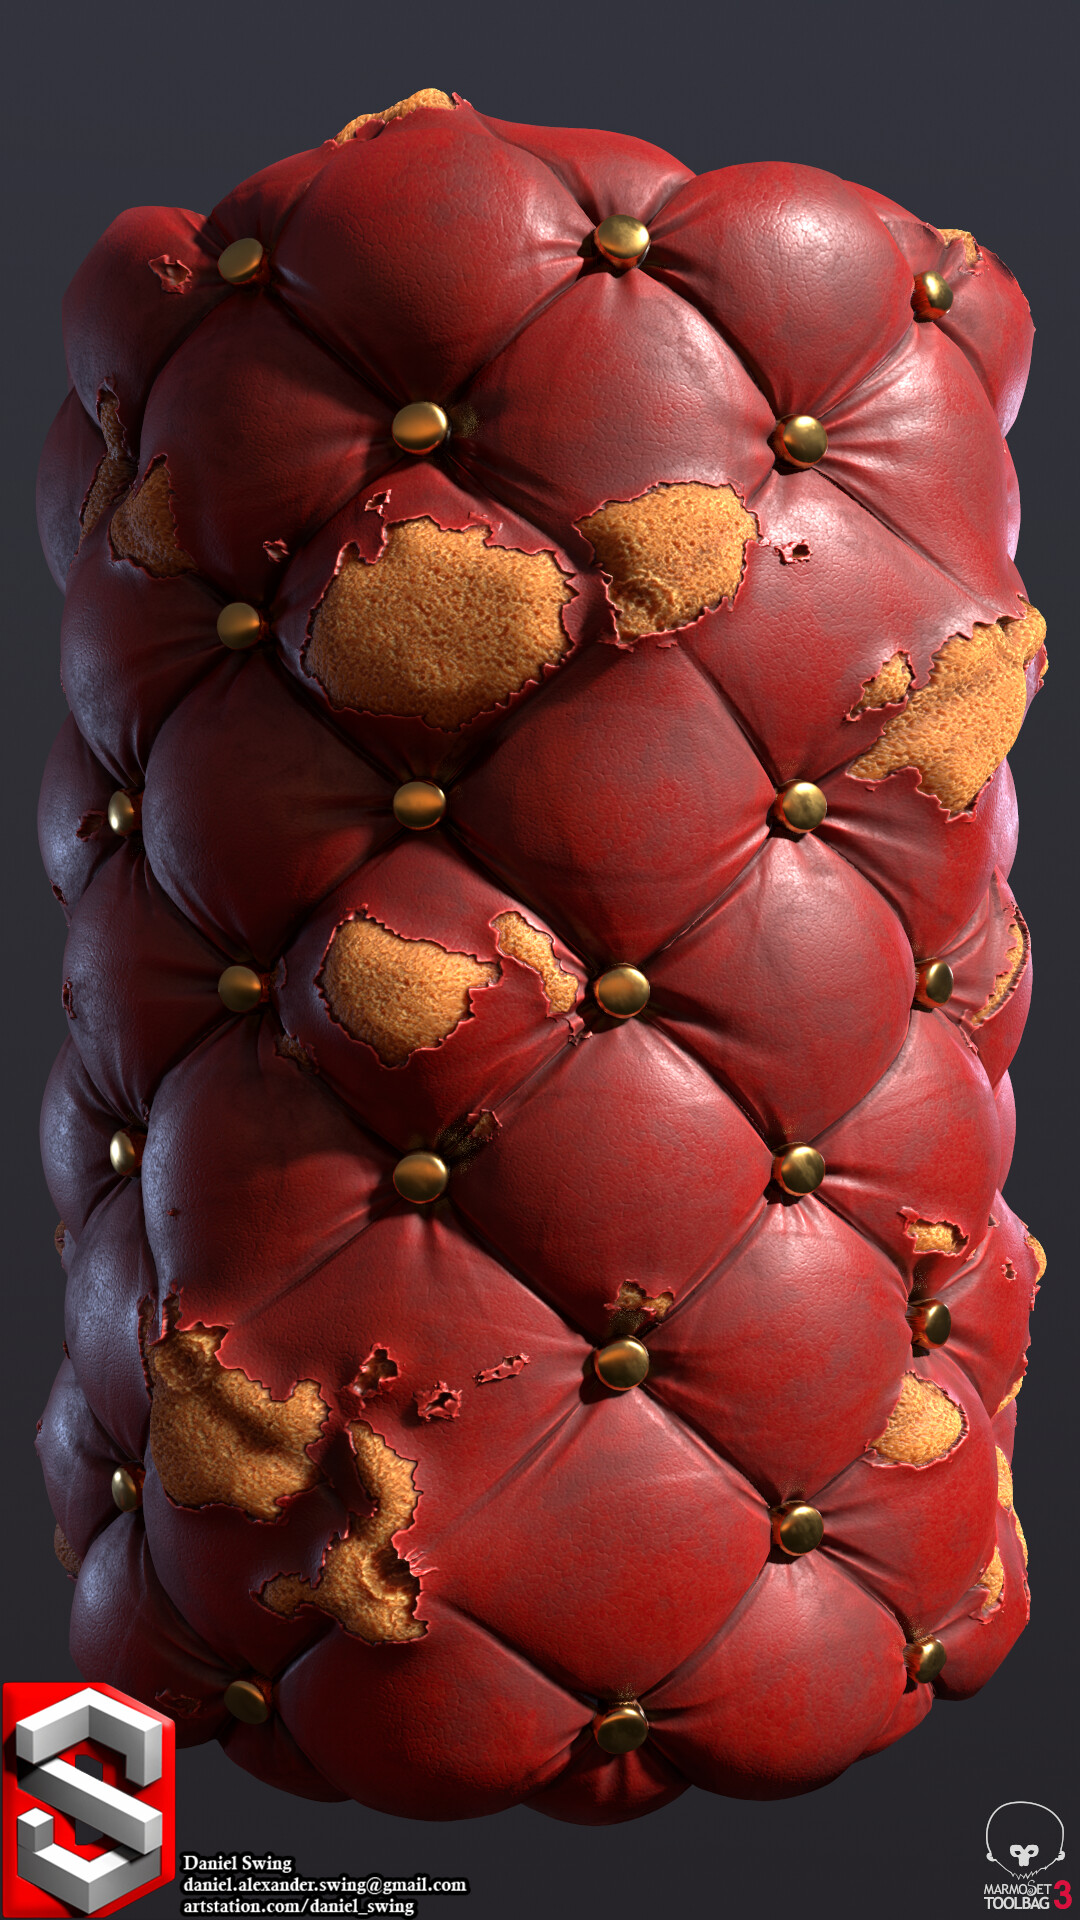
Base:
I started with a 'Tile Random' (the 'Tile Sampler' or any similar node also works fine) to make a 4 by 4 Paraboloid pattern, scaled them up to 1.5 (make sure to set the tile node's blending to 'max-lighten' or the shapes will cut into each other) and then used the 'Safe Transform' to rotate the pattern 45 degrees.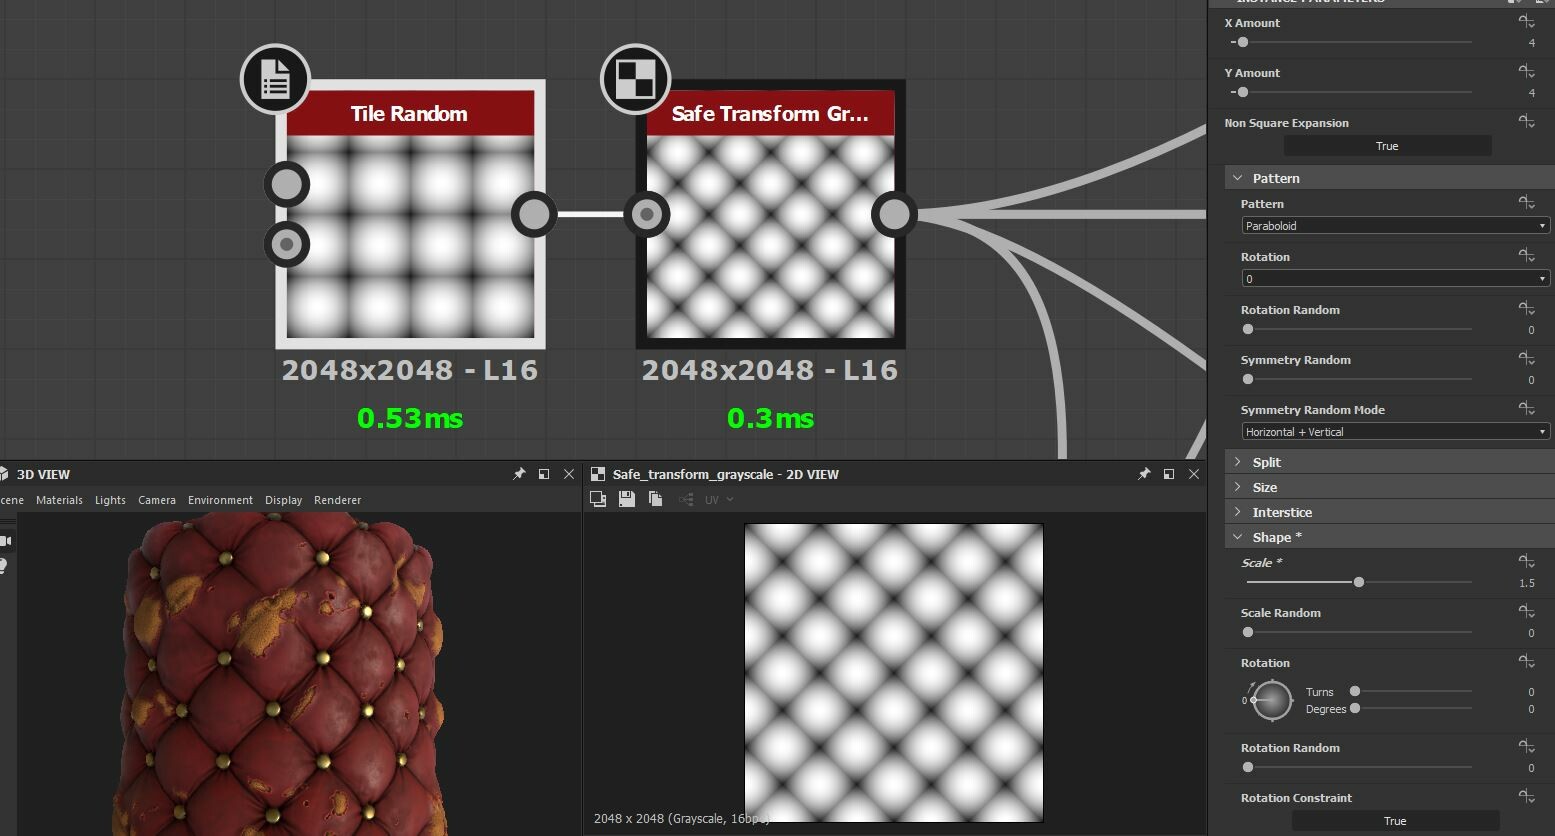
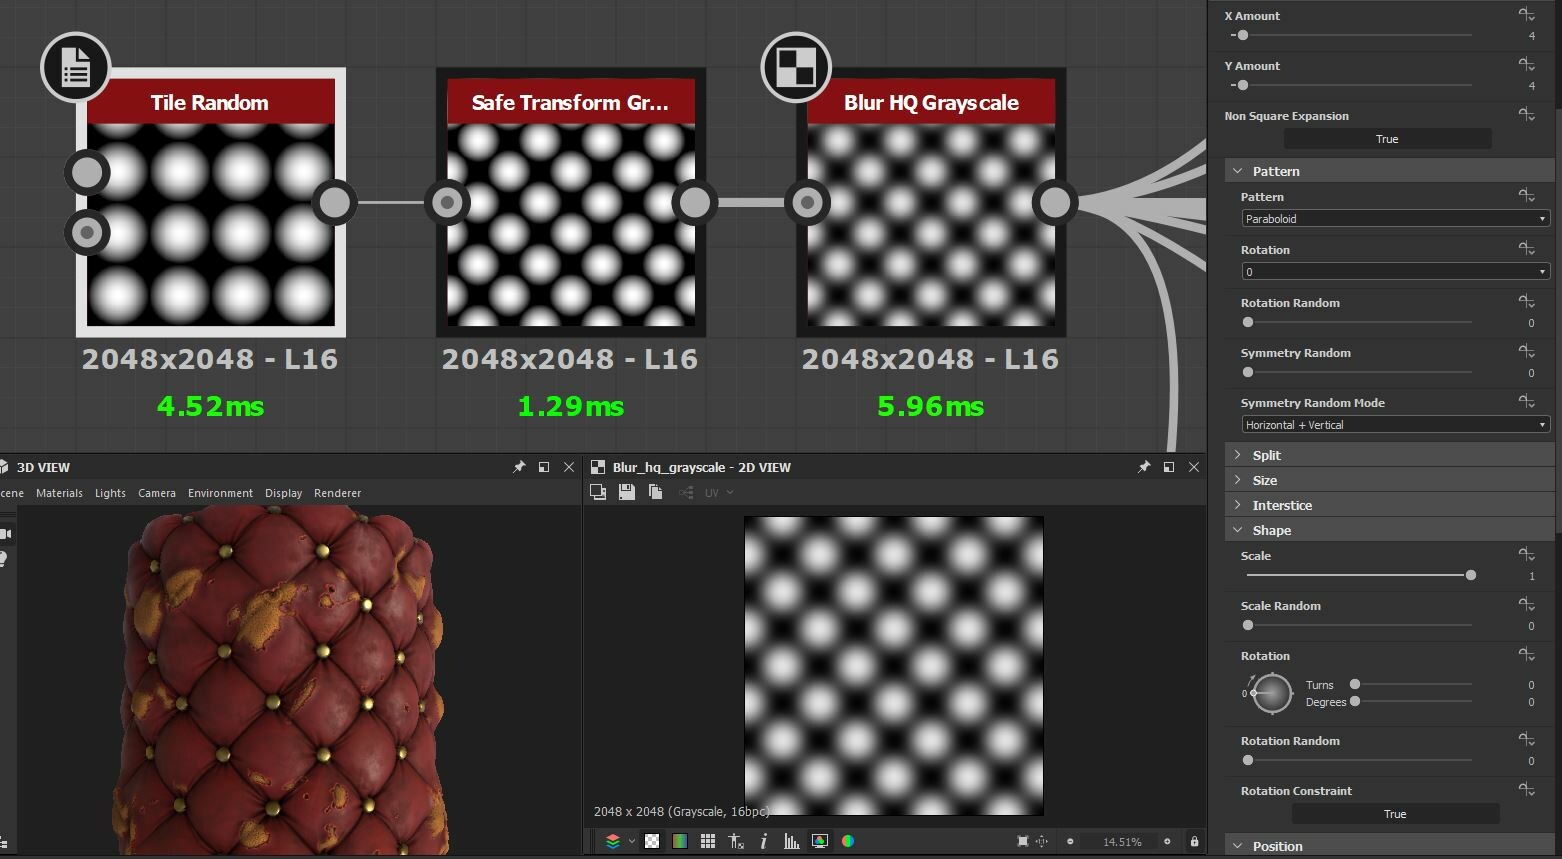
I simultaneously made a similar pattern with smaller, blurred Paraboloids: This other pattern is used a lot in the graph to warp other shapes and patterns to make them flow with the base shape, but is never itself inputted to the height-map. (I'll refer to this as "my warp pattern" for the rest of this article).
Damage:
I generated a black-and-white image to mask out the damage and wear.
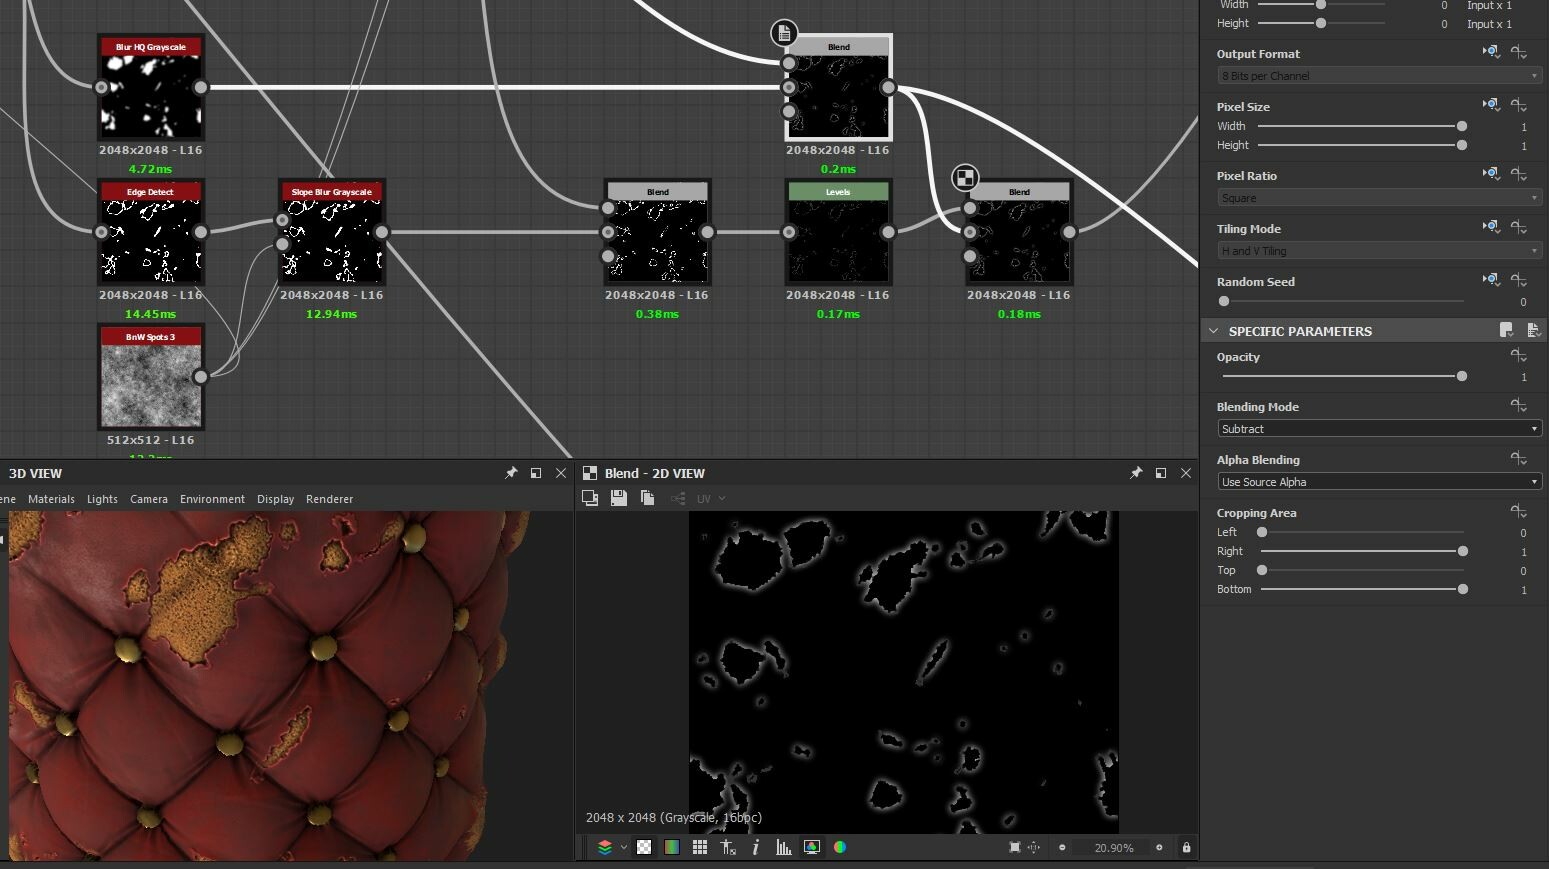
I took a regular 'Clouds 2' noise, warped it with my warp pattern, then a 'Slope-Blur' (with a 'Perlin Noise' as slope input). I use the 'Hightpass' to flatten out the values a bit, then I drag it through a 'Histogram Scan' to generate small white islands. I use and edge detect on these small islands to smooth and round their silhouette a bit, and then blend the new edges over the islands with the 'Add' blend mode. Then I add in some extra noise by dragging a 'Directional Noise 4' through a histogram. Finally, I use another 'Slope-Blur' at a very low intensity to rough up the edges a bit.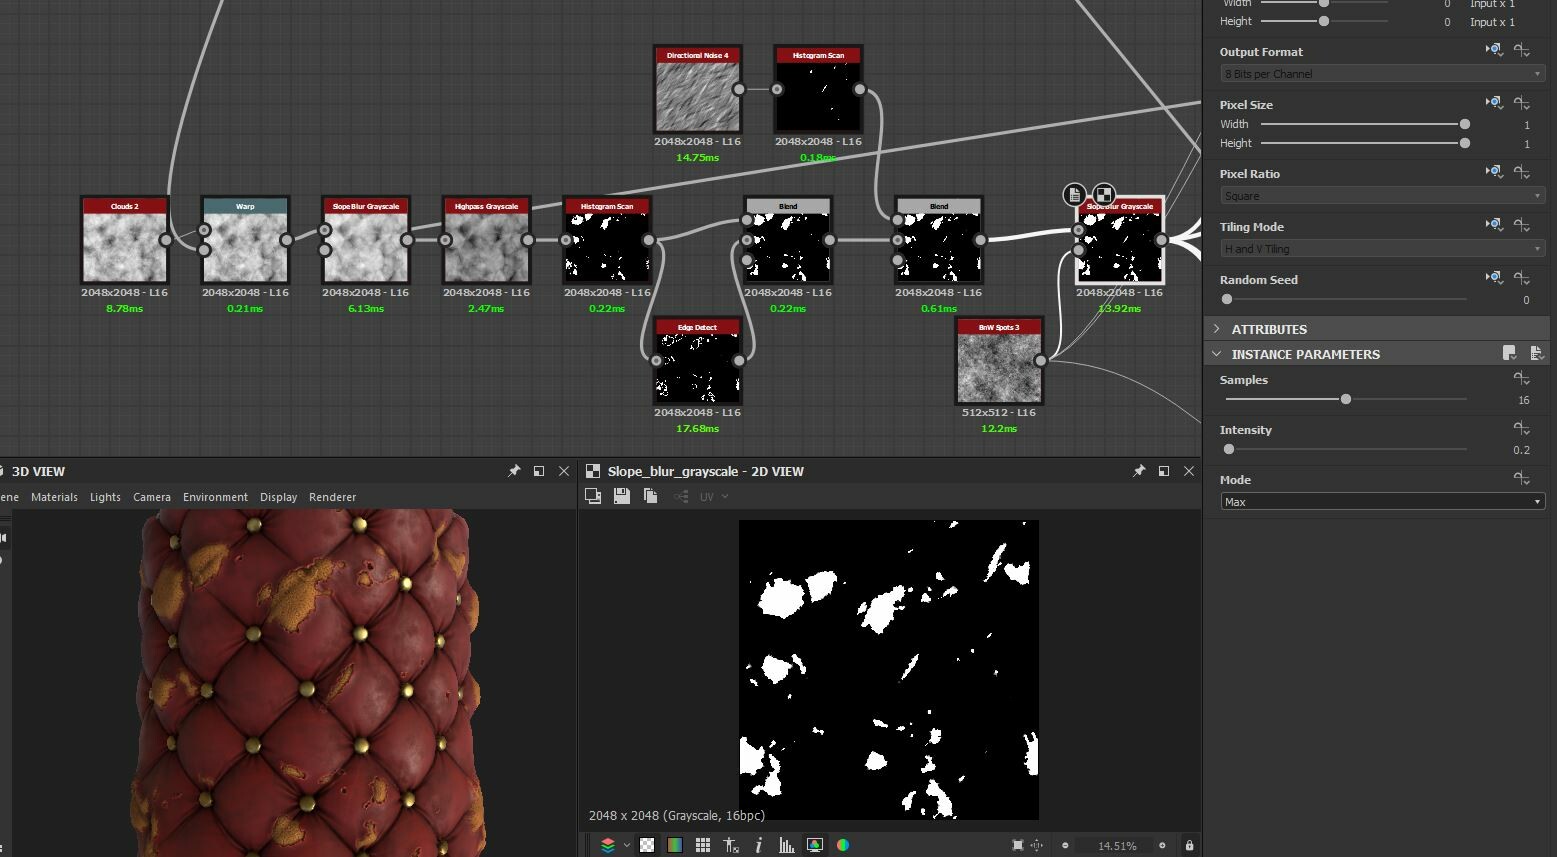
This pattern is important for many other parts of the graph, often used as a mask.
Buttons:
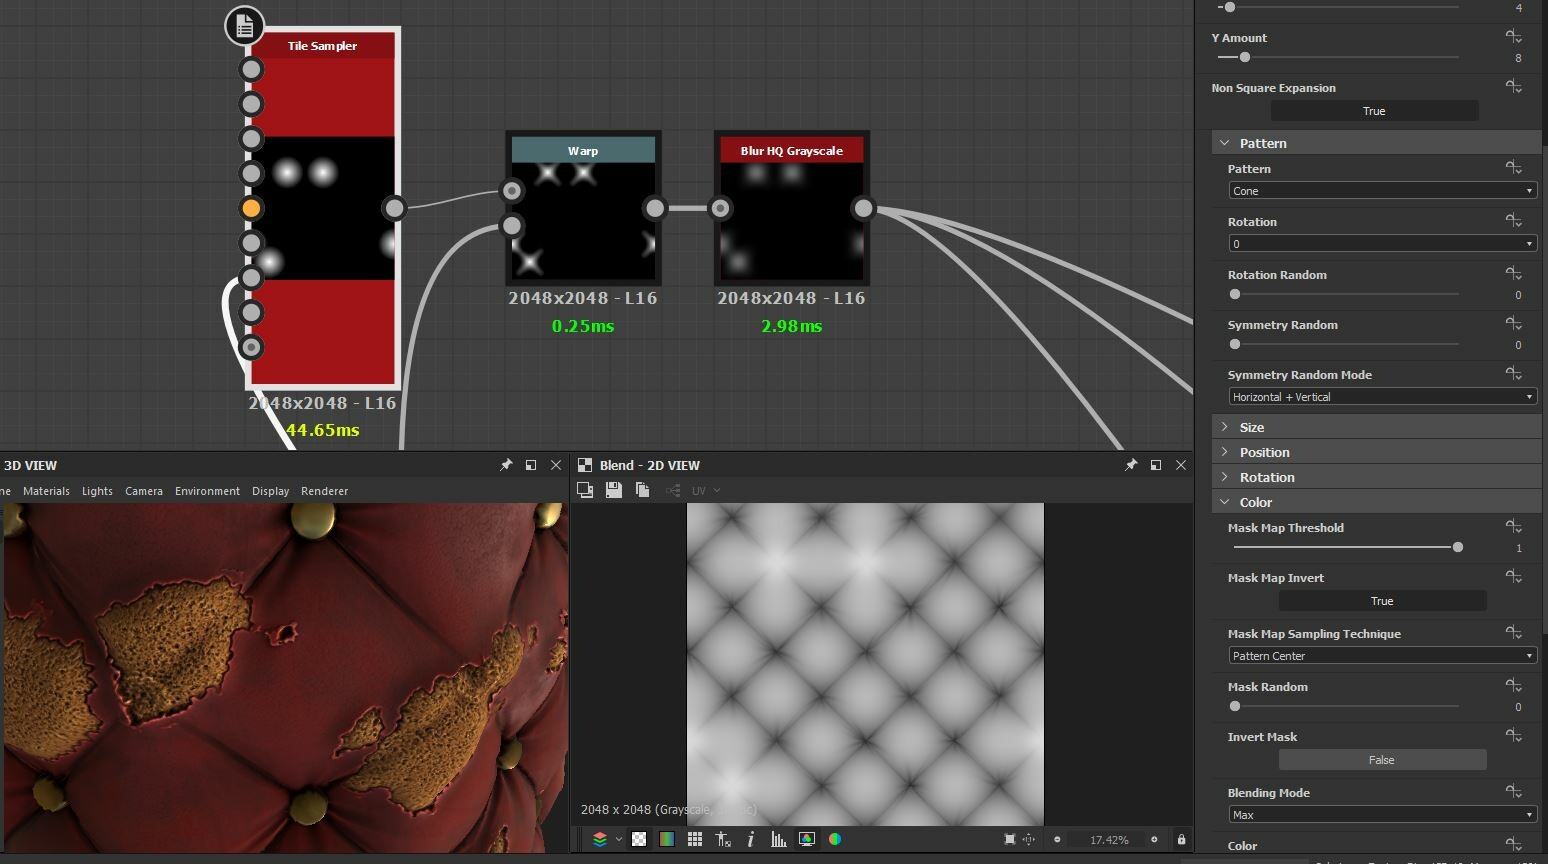
By setting the 'X Amount' to 4 and 'Y Amount' to 8, dragging the 'Offset' to 0.5 and the 'Global Offset Y' to 0.5, the buttons are places right between the cushions in the height-map (except for where I mask them away).
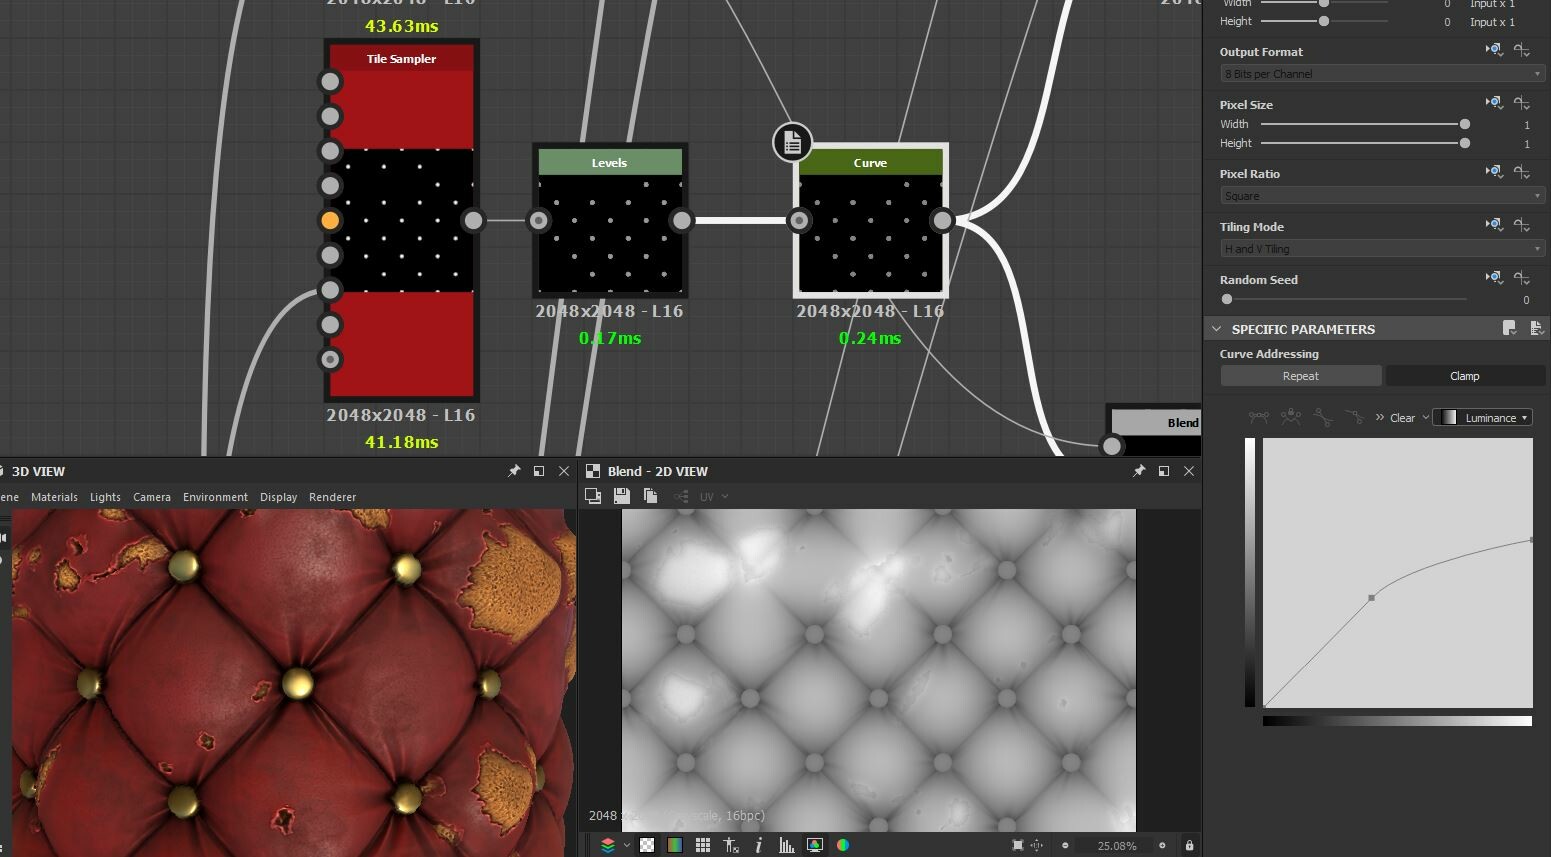
The Button shape is a paraboloid that I modify with a 'Levels' and a 'Curve' node to a more appropriate shape.
I use and inverted variant of the damage pattern as a mask input in the 'Tile Sampler' to remove the buttons from the damaged areas (Mask Map Threshold is set to 1).
Ripped buttons:
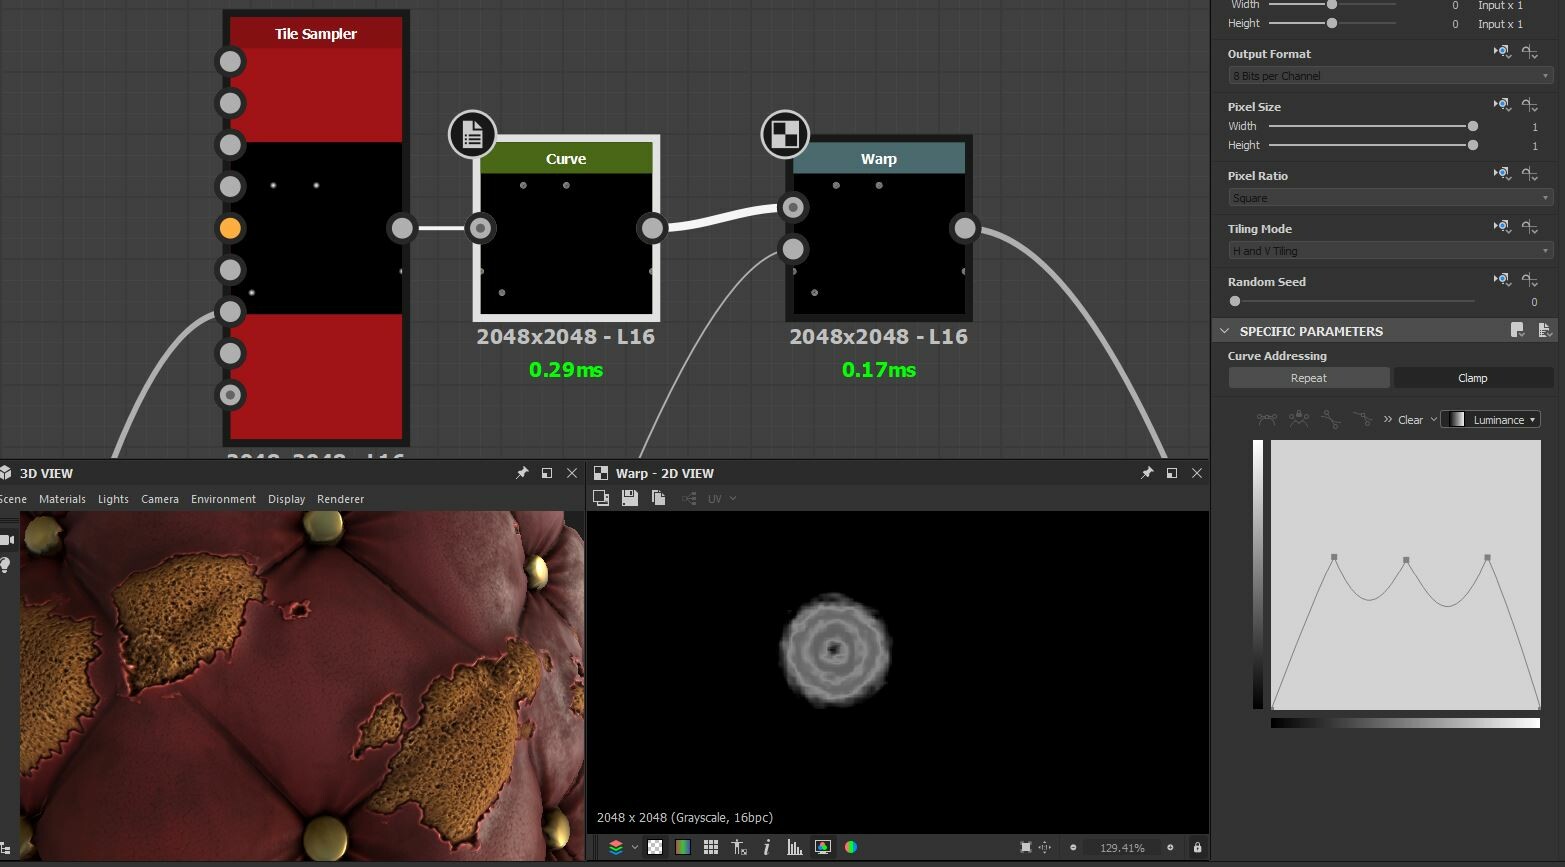
This time I want to generate shapes where there are not buttons (I use the original, non-inverted damage mask). The 'Tile Sampler' generates 'cones' that I modify with a 'Curve' node (see image) and then warp it with a 'BnW spots 3' noise.
Stretching and tugging:
This is definitely something that could do with improvement. This is just a quick and easy way.
Over the cushions:
I use a 'Crystal 2' noise, directional warp with a solid gray-scale pattern (to prevent the stretching from overlapping between cushions) and then warp it with my warp pattern (to simulate that the stretching is following the shape of each cushion). I do both a horizontal and vertical pattern like this. I then blend them both, very faintly, in to my height-map.

Under the buttons:
I use two differently randomized 'Starburst' shapes as pattern inputs in a 'Tile Sampler', in the same exact arrangement as I generated the buttons. I add some rotation and scale randomness as well. I then warp the starburst pattern with my warp pattern and the base of the height-map (slightly, just to make them flow with the shapes). Before I blend them into the height-map, i adjust the values a bit with a 'Curve' node.

No buttons:
I want the padding to bulge out where the buttons are missing. I use a similar 'Tile Sampler' as I did with the ripped-button marks, only with larger sized cones. I warp the cones with my warp pattern and then I use a 'Blur HQ' with a high intensity (the soft fall-off is important for a smooth blending). I adjust the values with a 'Level' node before I blend it into the height-map with 'max-lighten'
Hey, are you reading this?
Padding:
I use the damage mask as a base, blur it a bit (this is what makes the padding bulge out) and bring up the black values to mid-gray (0.5 linear). I multiply a blurred version of the basic height map on top of it (making the padding follow the shape of the entire material), subtract the 'Dirt 5' noise from it (this is what makes the spongy look) and then add in some extra bulging where the buttons are missing.
I mask the padding with the damage pattern.

Edges:
To add a thickness of the fabric around the damaged areas (and not just have a flat transition between fabric and padding), I take the damage pattern, blur it a bit and then subtract the original patter from it (to cut away the areas where the padding is exposed). This way I get gradients surrounding the damaged areas (the fall-off is important or this "lip" won't blend smoothly into the cushions).
I hope this is of some help to someone. Let me know if you think I should continue bothering with these blog posts.
If there's anything unclear or something else you wish me to cover, just ask!