
(WARNING! My method worked well for THIS game project, it is not a universal solution to graphic optimization and there are probably a thousand ways to improve upon this)
I'm back with a little break-down of my recent work on a small game project!
I've covered some techniques in Substance Designer before, so now I wanted to give some pointers when it comes to implementing textures into a game engine as well. It's one thing to make nice looking textures, it's another one to make it actually work in a game - Both are extremely important when it comes to game development, of course.
I'll bring up some decisions I made during my process, on how I broke it down and optimized this scene. I used Maya for modeling, Substance Designer for texturing and Unity is the game engine - though my theory is applicable for other tools as well.

Level-Designer Friendly
Nobody knew what the final layout of the level was going to look like or when it would be finalized - I had to make building blocks and modular pieces so that the level designers could work and iterate on their design, while also not waiting for them to finish up before I finished my work.
I bring this up because this greatly impacts what is "reasonable" optimization. To minimize draw-calls, one could have made the entire scene into one model with one material. That was not possible in a short project such as this, without impairing other areas of the game development process, such as the level-design.
Textures and Resolution
The camera is almost static, not much movement or zooming will be happening. Almost the entire scene will be visible at all times. Knowing this design decisions, I could adapt my texturing work-flow:
I had ~1920x1080 pixels to cover in textures (I'm assuming the screen resolution here). This means that one 2k texture (2048x2048 pixels) would technically cover more than the entire screen. This means that a 2k texture will never be displayed at full resolution in the game, which makes it somewhat pointless to put multiple 2k textures in the game when they will definitely get mip-map:ed down by the game engine.
What I did was that I put all of my textures into one atlas: one 2048x2048 split into 4 by 4 number of sections (I used Bruno Afonseca's Atlas node). Note: remember to add some padding between the textures.
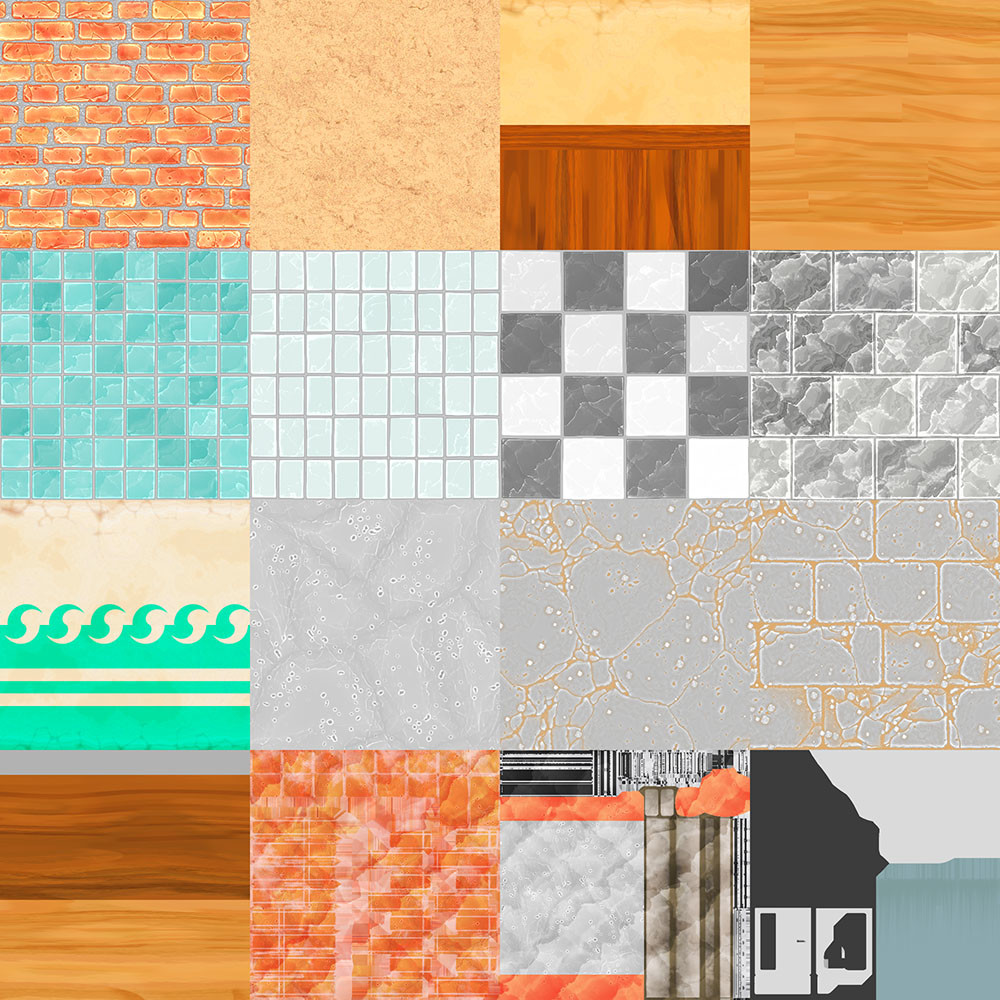
-This means that the computer only needs to fetch and keep one texture in memory, instead of 16 different 512x512 texture maps. In hindsight, I could probably have pulled the individual texture-sizes down to even lower than 512x512 (As you can see, the 512x512 sized textures still renders "fine" on this very-close-up shot, that the game it self will never show).


UV-mapping
I mapped the UV's of my models according to the texture atlas - remember padding!
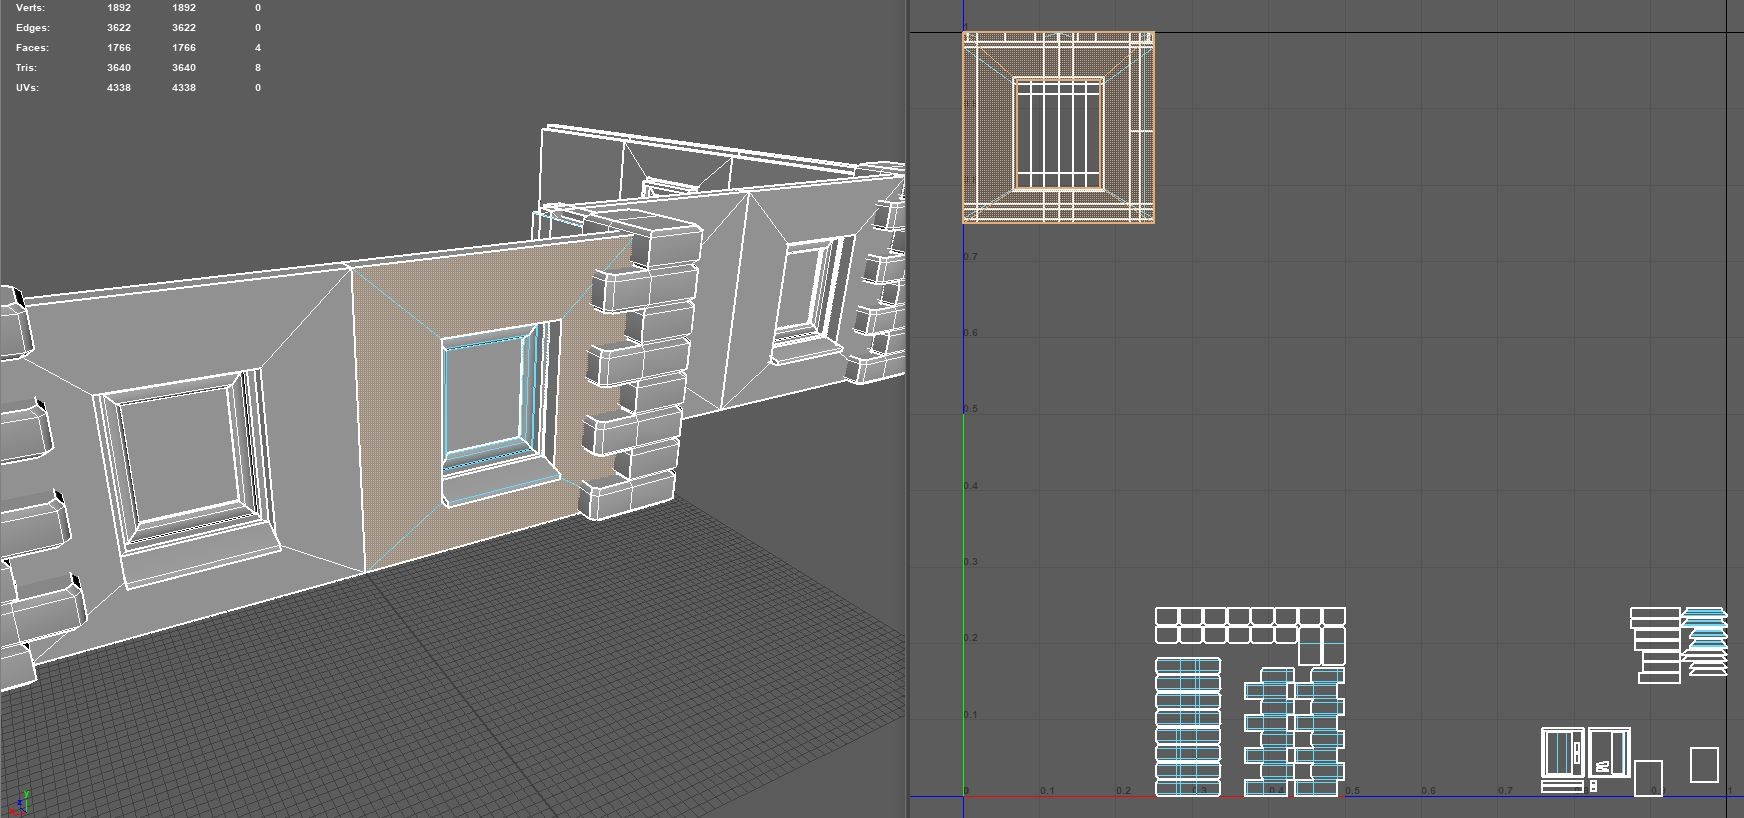
However, not all interior walls look the same, they use different sections of the texture atlas (see screen shot, wooden panel and bathroom tiles, etc). Instead of making additional models and UV-map them to other UV-coordinates for each wall-type, I built a custom shader so I could cut and paste parts from the texture atlas into the correct UV-coordinates in the material instances (for example, move the bathroom tiles to the interior wall UV-coordinates) - This does mean that each set of uv/texture alterations needs its own material instance.
(I used Amplify Shader, since Shader Graph isn't fully implemented yet and Shader Forge doesn't really work for resent releases).
Texture Packing
Texture 1: Base Color in RGB and Roughness in Alpha
Texture 2: AO in R, green normal channel in G, metallic or opacity in B and red normal channel in Alpha
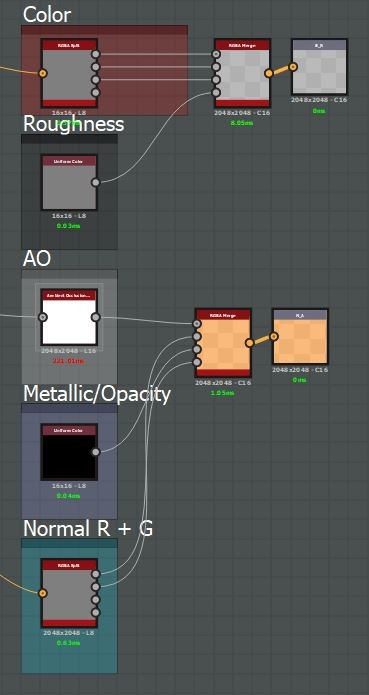
(The green and alpha channel keeps the highest bit-depth, which is why I pack the normal information into them, as well as the roughness)
This way, I only need to fetch two 2048x2048 texture maps to cover my entire scene with all material information I need. Of course, this packing also needs to be "un-packed" in the shader accordingly.

All in all: This scene is textured with one 2048x2048 texture atlas, uses only a few material instances and can very easily be altered and iterated on.
Is there anything I left out? Anything I didn't think of or something I could improve? Is my writing unbearable to read? I'm happy for any feedback or questions!